|
|
||
|---|---|---|
| images | ||
| LICENSE | ||
| README.md | ||
| install.sh | ||
| uninstall.sh | ||
README.md
SimpleMailserver
A script to facilitate easy installation of a Postfix mail server + Gmail relay for custom emails you can easily access from the Gmail client or other clients supporting SMTPS and POP3
Before installing
- Some ports must be exposed to be able to host a mailserver, and to prevent abuse most registrars disable these ports by default. Contact support to have them opened:
- 25: SMTP
- 110: POP3
- 143: IMAP
- 465: SMTPS
- 587: Submission
- 993: Secure IMAP
- 995: Secure POP3
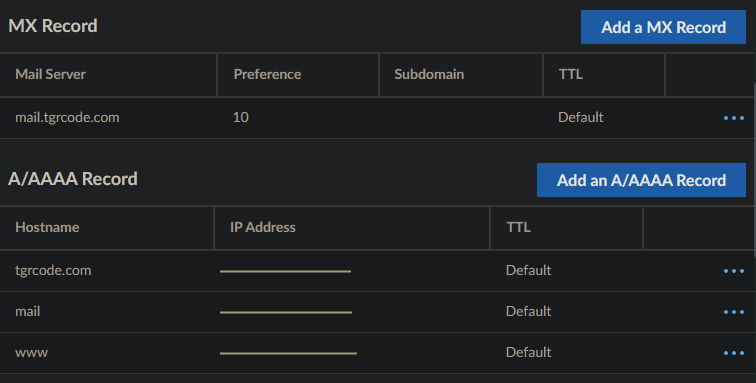
- Certain DNS records must be added, namely MX and AAAA. MX must contain the mail.domain.com domain and AAAA must contain the mail subdomain
- Generate an app password at https://myaccount.google.com/apppasswords
- Select
Other (Custom name)and enter a distinctive identifier, likeMailserver mail.domain.com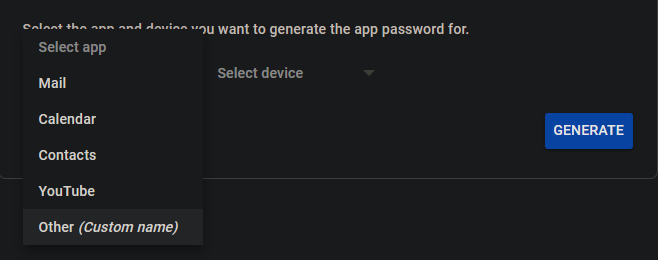
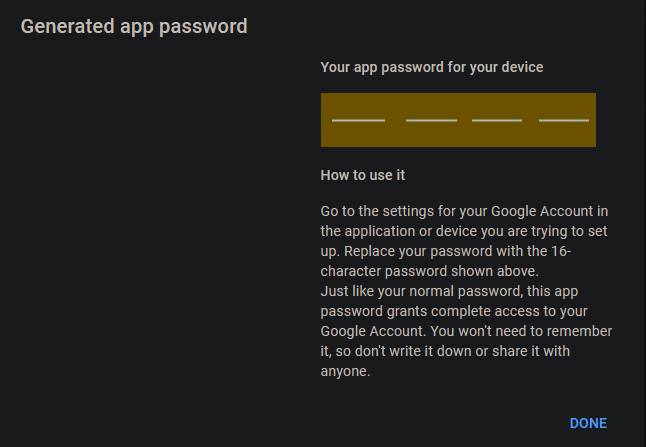
- Select generate and keep this app password for installation. You will not be able to see it again so make sure to record it somewhere
Installing
Run the following command to install
su - -c "bash <(curl -fsSL https://raw.githubusercontent.com/TheGreatRambler/SimpleMailserver/main/install.sh)"
The installation script will ask for some values:
- Domain name: Domain name used in the email, also required to configure SSL
- Mail subdomain: Subdomain where actual mailserver will be hosted, it is good practice to not put the mailserver at root
- Admin user: User where administrator mail like webmaster,postmaster etc will be sent
- Certbot email: Email where certbot, SSL, updates will be sent
- Gmail email: Email required to authenticate with the Gmail relay
- App password: Google app password under previous gmail that identifies this server to Google
After installation
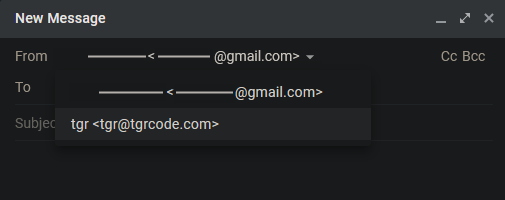
Your new mailserver is most useful when paired with a email client supporting SMTPS and POP3. Gmail has been tested to work but other clients likely work
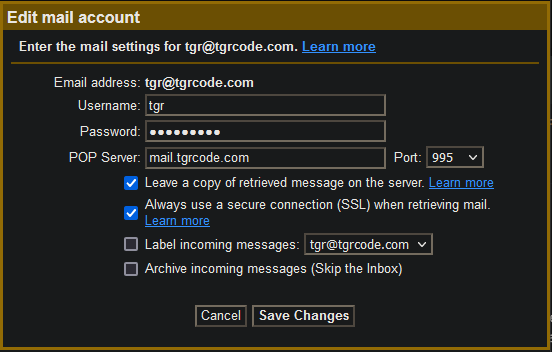
- Open
See all settingson Gmail and navigate toAccounts and import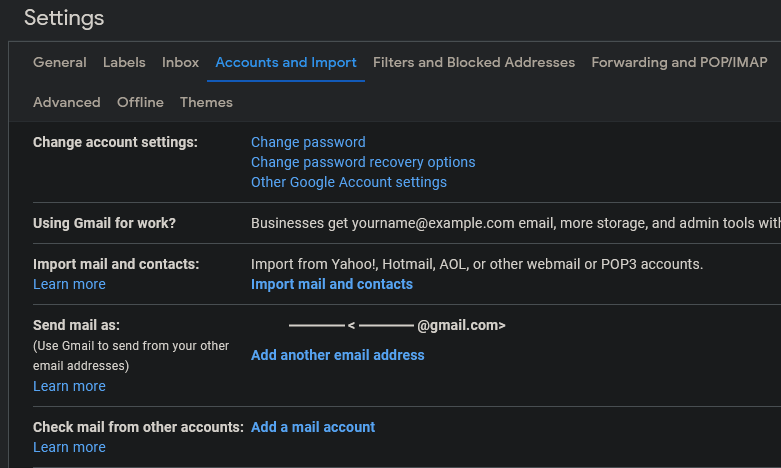
- Click
Add another email addressand fill out the form. UncheckTreat as an alias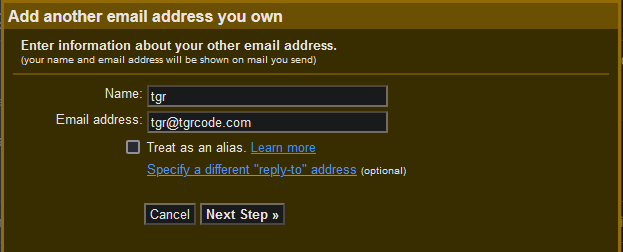
- Configure using the desired user on the mailserver, like the admin user you entered earlier
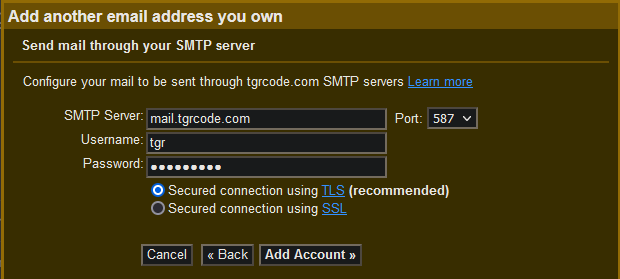
- SSH into your mailserver. Check the mail using
runuser -l user -c 'mail'with the user you entered. Enter the number of the most recent email fromGmail Teamand search forConfirmation code: XXXXXXXXXin the body of the email. Copy that code and enter it into the dialog on the Gmail client. Exitmailby pressing q twice and pressing Enter. - Disable
Always reply from default address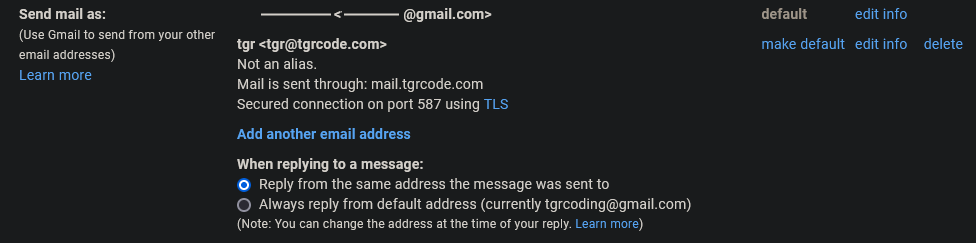
- Click
Check mail from other accountsand enter your custom email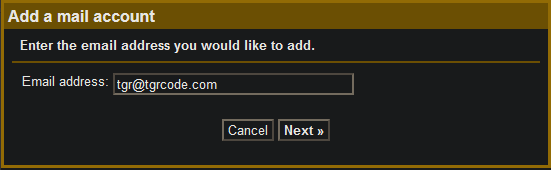
- Enable
Import emails from my other account (POP3) - Fill out the form, making special care to use port 995
- You can now send email under your custom email
Creating a profile picture
- Create SPF record as a TXT record, replacing the IP with your own
Value: v=spf1 ip4:127.0.0.1 ~all
- Create DMARC record as a TXT record, replacing the email with the email you want to recieve periodic DMARC reports
Hostname: _dmarc
Value: v=DMARC1; p=reject; rua=mailto:example@example.com; adkim=s; aspf=s; sp=reject
- Create default BIMI record, replacing the URL to an image to your desired profile picture
Hostname: default._bimi
Value: v=BIMI1; l=https://example.com/bimi/logo.svg;a=self;
The profile picture must be SVG Tiny 1.2, which is a slightly different version of SVG. When you generate your SVG ensure the following attributes are set:
<svg
   version="1.2"
   baseProfile="tiny-ps"
   ...
   xmlns="http://www.w3.org/2000/svg">
Line endings must also be LF only (Windows uses CR LF by default) 4. Support for Gmail and Outlook require a VMC. Because it is 1500$ a year I can't provide a guide on it
Gmail method for profile picture
- Navigate to
Google Account -> Personal info -> Contact Info -> Alternate emailsand add your custom email there - Set the profile picture of that Google account to the desired picture
Uninstalling
Run the following command to uninstall
su - -c "bash <(curl -fsSL https://raw.githubusercontent.com/TheGreatRambler/SimpleMailserver/main/uninstall.sh)"